24Hours Tel
0086-139 8951 3573
Free Inqiry
E-mail:[email protected]
24Hours Tel
0086-139 8951 3573
Free Inqiry
E-mail:[email protected]
A compression joint between two lengths of copper tube is weeping. You have already nipped the nut up once; the drip stopped for a few minutes and then came back. You tightened it harder, and it started leaking faster. That sequence, tighten, leak, tighten again, leak worse, is close to the textbook signature of compression fitting failure, and it points straight at the single most common cause in the trade: the nut has been tightened past the point where the ferrule can recover.
That is the direct answer. Of all the reasons a compression fitting leaks, over-tightening the nut sits at the top of the list, ahead of poor tube cutting, a reversed or missing ferrule, a tube that never reached the shoulder, and galvanic corrosion. It earns first place for an uncomfortable reason: it is caused by the installer's own hand, and it happens precisely after the leak it was supposed to cure has appeared. What follows explains why more torque destroys the seal rather than restoring it, how to read the damage once it has occurred, and what correct cutting, assembly and tightening actually look like.
A compression fitting has three working parts, and none of them seals on its thread. The body carries a tapered seat inside. The ferrule, sometimes called the compression ring, olive or sleeve, is a small ring of brass or steel sitting between the nut and the body. The nut drives that ferrule axially into the taper.
As the nut comes down, the ferrule meets the taper, is forced radially inward, and bites into the outside wall of the tube. That bite, an interference fit between ferrule and tube, is what holds the pressure back. It is not the thread. The thread has exactly one job: to maintain axial preload between ferrule and seat. Nothing else.
The design deliberately makes the ferrule yield, but only once. A brass ferrule deforms plastically during assembly, and once it has done so it is essentially set. Additional torque at that stage adds no sealing capacity at all, because the seal already exists from the moment the bite forms. All the extra torque does is travel onward into the ferrule, the tube and the body taper, pushing each of them past the limit they were dimensioned for.
Twin-ferrule designs split the work: a front ferrule grips and seals, a back ferrule backs it up and helps absorb vibration. Single-ferrule designs use one component for both roles, which makes them markedly less forgiving of over-tightening and, for that reason, more prone to leak under heavy-handed installation. Either way there is a ceiling, and past that ceiling the fitting starts to damage itself.
Once the ferrule has seated, additional tightening has nowhere useful to go, so it discharges into several directions at once, and every one of them leaves permanent damage behind.
That last point is what makes over-tightening so deceptive. The fitting may look fine on the day it is installed and hold perfectly under static pressure for days or weeks before failing, when thermal cycling, pressure fluctuation or a single water-hammer event finishes it off. When the installer returns and finds the nut still tight, the obvious conclusion is that the problem lies elsewhere, so the spanner comes out again or the whole assembly is replaced with something more expensive. Neither action addresses the actual cause.
The table below ranks the reasons compression joints leak by the frequency with which they turn up in real repair work. The top row is what a fitter should check first on any weeping joint; the further down the list, the less likely the explanation.
| Rank | Cause | What You See | Why It Happens | Remedy |
|---|---|---|---|---|
| 1 | Nut over-tightened | Joint weeps; nut feels tight; ferrule distorted and tube deeply grooved | Ferrule pressed beyond its bite point, elastic preload lost | Cut back the tube, fit a new ferrule, retighten to the specified turns |
| 2 | Ferrule reversed or missing | Leaks immediately on assembly; no bite mark on the tube at all | Ferrule never engaged the taper | Strip down, orient or fit the ferrule correctly |
| 3 | Tube cut badly | Continuous weep around the seal line; burr or slant visible on the tube end | Ferrule bites onto a slant or a burr and cannot form a continuous ring | Recut squarely with a tube cutter, deburr inside and out |
| 4 | Tube not pushed fully home | Holds at first, starts weeping after a few days | Insufficient sealing length behind the bite | Cut back, mark insertion depth on the tube, reassemble |
| 5 | Thread standard or size mismatch | Nut jams after two turns, or screws all the way down and still leaks | Different thread forms never seal against each other | Identify the thread on the body and tube, replace with the matching part |
| 6 | Vibration loosening the nut | Slow weep after weeks or months; nut can still be turned further | Preload lost over time | Retighten, support the pipe run, add a locking provision where allowed |
| 7 | Ferrule or tube reused | Leaks as soon as it is reassembled | An already-set ferrule cannot bite a second time | Replace the ferrule every time the joint is broken |
| 8 | Galvanic corrosion | Pitting and white or green deposits after months in service | Dissimilar metals in contact with an electrolyte | Isolate the metals or use the same material throughout the joint |
| 9 | Temperature or pressure outside rating | Weeps hot, stops cold, or leaks only at pressure peaks | Fitting specification does not match the duty | Reselect the fitting for the actual operating conditions |
You rarely have the luxury of new parts, so diagnosis comes down to what you can see once the joint is open. Over-tightening leaves a distinctive fingerprint if you know where to look.
One more field habit worth keeping: brush soapy water or a commercial leak-detection fluid around the joint and pressurise. The bubbles from a slow weep surface far earlier than a puddle underneath the fitting does.
The sequence is not complicated, but each step has to be done properly.
The quarter-turn rule sounds like guesswork and is often taught that way, but it has a physical basis: it is roughly the angle needed to take a ferrule from contact to bite, and it is a proxy for torque rather than an exact figure. Small brass fittings, up to about a quarter inch, generally seal within a quarter turn past finger-tight, while larger sizes may need closer to a half turn. Wall thickness and material hardness all shift the number, which is why the manufacturer's published figure beats any rule of thumb. If you are working to a torque wrench instead, use the supplier's torque table rather than inventing a value. Anyone assembling a mixed batch of joints, or documenting a procedure for a workshop, benefits from the standardised descriptions of compression fitting types and how each is installed.
Not every weeping joint traces back to a heavy hand on a spanner. A second group of failure modes exists, less common but real, and they usually show up months or years after installation rather than on the day of commissioning.
Vibration works on a fitting in two ways at once. It gradually backs the nut off, reducing preload, and it frets the contact between ferrule and tube, wearing away the metal that was doing the sealing. The result is a slow weep that appears on the equipment side of a pipe run, near a compressor, pump, engine or hydraulic power unit, while joints in the middle of the run stay dry. Supporting the pipe so the fitting carries no vibration load usually settles it.
Thermal cycling works through repeated expansion and contraction. Brass expands roughly half again as much as steel, which is why mixed-material joints change preload every time the system comes up to temperature. After a few thousand cycles the ferrule no longer holds the tube with the same force it did when it was installed. A leak that appears only when the system is hot and stops once it cools is thermal cycling announcing itself.
Galvanic corrosion is the slow, quiet one. Where a brass fitting threads into an aluminium or stainless component and moisture is present, the potential difference between the two metals drives a small current that eats the less noble one. You see white or green deposits, pitting, and a gap that opens up at the sealing face. The fix is not simply a new fitting; without isolation or a change of material, the replacement will go the same way.
Pressure pulsation and water hammer sit alongside these. A transient surge can briefly push system pressure to several times the steady working value, and every surge loads the ferrule a little further past the point it was set at. Eventually it gives.
A compression fitting's reliability is decided long before anyone picks up a spanner. Brass is the default for most joints because it machines cleanly, resists attack in potable water, and deforms predictably when it seals. Stainless steel hydraulic fittings handle aggressive media and higher temperatures but demand more force to seal and are correspondingly less forgiving of a heavy-handed assembly. Aluminium is softest of the three and deforms most readily under torque.
Thread standard is the second invisible variable, and the one most often confused in the field. BSPP, NPT and metric threads look similar and will often start onto one another, but their forms differ and they do not seal together. Force a mismatch and the nut binds after a couple of turns, or runs down all the way without sealing. Check the marking on the body against the thread on the port before anything is assembled.
Tolerance is the third variable and the least intuitive. Tube outside diameter, ferrule inside diameter and cone angle each carry a tolerance band, and the three stack up. A ferrule at the top of its bore tolerance on a tube at the bottom of its diameter tolerance takes noticeably more turning to seal; the reverse combination can bite too deeply almost immediately. The tighter a manufacturer holds those bands during machining, the wider the range of tightening turns that still produces a sound joint in the field. It is the reason two fittings built to the same drawing can behave completely differently in the hand. For brass compression fittings, that dimensional and surface discipline is what separates a part that seals first time from one that leaks on the third attempt.
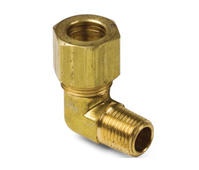
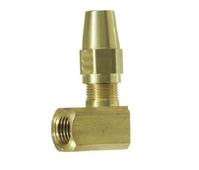
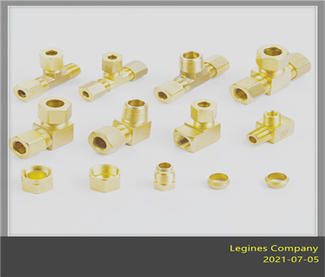 Brass Compression Fittings and Connector RangeUse this range to compare sleeves, nuts, unions, adapters and elbows when joint sealing depends on tube and ferrule condition.View Product →
Once the joint is open you have a few seconds to decide whether to repair or replace, and the decision rests almost entirely on the condition of the tube and ferrule rather than on how much time you have.
One habit is worth more than any of these rules: never cure a leaking compression joint by tightening it further. Depressurise, open it up, and look at what the ferrule and tube end are actually telling you. Tightening is an assembly step, not a repair method.
When buying compression fittings, the specification sheet is only the starting point. The ferrule is where the questions should go. Ask what material it is made from, how it is heat-treated if at all, whether it comes from the same production batch as the body, and how its dimensions are verified. A ferrule whose bore runs a fraction wide will, in one installer's hands, become a fitting that leaks repeatedly, and no purchasing manager can predict which joint that will be. The workshop remembers.
For commercial vehicle air brake systems destined for North America, insist on fittings carrying the DOT marking. Air brake products built to Department of Transportation requirements and stamped accordingly give you a traceable baseline, and on a braking circuit a weeping joint is a safety matter rather than a maintenance nuisance. The same discipline applies to copper brake tubing: sound brass bodies, correctly formed ferrules, consistent end finishing.
Batch consistency matters more than the quality of a single sample. The first hundred fittings may assemble well; the five-thousandth only will if dimensions and surface finish are verified lot by lot and test reports can be produced on request. From the buying side, that consistency is purchased rather than hoped for. A supplier who can provide material and dimensional reports by batch, and who will ship a trial quantity so your own fitters can verify the tightening feel on a real pipe run, saves you six months of site complaints. A policy of no minimum order quantity is useful precisely here: not so you can buy in dribs and drabs, but so the workshop can assemble the joint before the bulk order is placed.
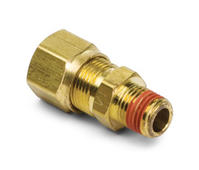
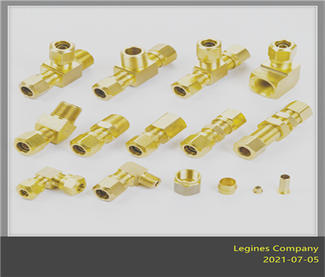 D.O.T. Air Brake Nylon Tubing FittingsCategory covering sleeves, nuts, unions, tees, elbows and connectors for air brake systems, with batch consistency and trial quantities available.View Product →
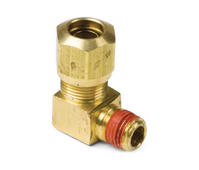
 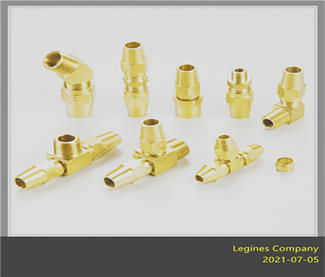 D.O.T. Air Brake Copper Tubing FittingsBrowse copper air-brake tubing sleeves, nuts, unions, tees, elbows and adapters; batch reports and trial quantities help verify fit before bulk orders.View Product →
So, what is the most common cause of leaking compression fittings? It is the nut turned too far. That single error accounts for more weeping joints than every other cause combined, and it is uniquely frustrating because it is self-inflicted and often arrives after the leak it was meant to fix. A crushed ferrule, a grooved tube and a scored cone are its signatures, and they are recognisable within seconds once the joint is open. Vibration, thermal cycling, corrosion and a thread standard mismatch all matter, but they are the second tier, the explanations you reach for once over-tightening has been ruled out.
The remedy is unglamorous. Cut the tube square, deburr it, mark the insertion depth, orient the ferrule correctly, bring the nut down hand-tight and then apply the specified turns. Pressurise, check the joint with soapy water, and if it still weeps, take it apart instead of adding more force. A compression fitting is a good seal. It is cheap, it can be remade, and it holds serious pressure. It only has a poor reputation because the instinct to give it one more turn is almost impossible to resist.
Add:Xingzhong Road DianKou Town Zhuji City Zhejiang Province China
Mob: 0086-139 8951 3573
Tel: 0086-575-87560582
Fax: 0086-575-87560582
E-mail:[email protected]

 英语
英语 西班牙语
西班牙语