24Hours Tel
0086-139 8951 3573
Free Inqiry
E-mail:[email protected]
24Hours Tel
0086-139 8951 3573
Free Inqiry
E-mail:[email protected]
A maintenance technician is called to a packaging line because the nylon air line feeding a valve bank has started weeping at the fitting. A homeowner finds a slow drip under the kitchen sink where the shutoff valve meets the copper riser. A refrigeration contractor has to run a new line to an ice machine in a ceiling space where an open flame is not allowed. All three jobs can be finished with compression plumbing fittings, two wrenches, and a few minutes of careful work. The conclusion that experienced installers reach after the first few hundred joints is simple: compression fittings are among the most forgiving connection methods in fluid handling, but the difference between a joint that drips at startup and one that stays dry for years is decided before the nut is tightened.
The seal in a compression fitting is not created by glue, solder, or thread dope. It is created by mechanical force. A metal or plastic ferrule is pressed between the fitting body and the nut, and as the nut advances it forces the ferrule to grip the tube evenly. The rest of this guide explains how to install compression fittings on copper and nylon tubing, how much to tighten them, what tools you need, and how to avoid the failures that send people back to the hardware store.
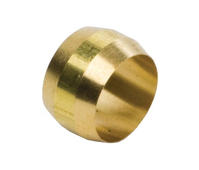
A standard compression fitting is made of three parts: the body, the nut, and the ferrule, sometimes called an olive or sleeve. The body has a conical seat at the compression end. The nut threads onto the body and pushes the ferrule into that seat. When the nut is tightened, the ferrule deforms and bites into the outside surface of the tube. The seal happens in two places at the same time: between the ferrule and the tube, and between the ferrule and the conical seat of the body.
This is worth understanding before you install anything because it explains several rules. The threads of the compression nut do not seal anything; the fluid never reaches them. That is why PTFE tape around the ferrule is not only unnecessary but harmful. Tape can prevent the ferrule from seating and create a path for leakage. Thread sealant belongs only on the other end of the fitting, where an NPT or BSP male thread enters a port.
You will meet two basic ferrule families. The first is a soft brass ferrule with a beveled leading edge, used on copper, brass, aluminum, and steel tube. The second is a nylon or plastic ferrule, used mainly with nylon and other plastic tubing. Nylon ferrules deform at lower torque, so they do not crush the tube, but they are generally not reusable. Some higher-end instrument fittings use two ferrules, with a front ferrule that seals and a rear ferrule that grips. For normal plumbing and pneumatic duty, the single-ferrule compression design is what most installers encounter.
Material quality matters more than it appears to. Because the ferrule is cold-formed onto the tube during installation, its hardness and surface finish have a direct effect on the joint. A ferrule that is too hard may not deform enough, and a ferrule that is too soft can flatten without biting. This is one of the reasons purchasing managers who buy thousands of fittings usually choose a supplier that can demonstrate consistent material control rather than simply the lowest price.
Compression fittings are sized by the outside diameter of the tube, not by the nominal pipe size. This confuses many first-time installers. Half-inch copper water tube has an outside diameter of five-eighths of an inch, so you need a compression fitting marked for half-inch copper tube, which actually fits a tube of 0.625 inch outside diameter. Quarter-inch nylon air line measures a quarter of an inch on the outside. The point is simple: measure the tube outside diameter with a caliper before buying, and do not assume the label on the old fitting is correct.
The body of the fitting also carries a thread at the opposite end, and this thread must match the port. Compression fittings commonly appear with NPT, NPSM, BSPT, BSPP, or SAE 45-degree flare connections on the other side. An NPT male end tapers and seals on the thread itself, while an NPSM or BSPP end may rely on an O-ring or a washer. Mixing thread types is one of the fastest ways to create an apparent compression leak that is actually a connection failure at the port.
Material selection follows the application. Plain brass is the standard choice for water, air, and oil. Nickel-plated brass adds corrosion resistance in humid or chemical environments. Lead-free or low-lead brass should be used for drinking water lines, and stainless steel is available for aggressive chemicals or high-purity processes. The pressure and temperature rating of the complete joint depends on the weakest component, which is often the tubing, not the brass fitting.
For maintenance stocks and repair vans, standardizing on one supplier helps keep ferrule sizes and thread configurations consistent. If you are setting up a spare parts kit, reviewing the brass compression fittings offered by a single manufacturer is a practical starting point, because the same body can be matched with several thread forms. A complete category listing with dimensional data makes that process much faster.
A successful compression installation does not require special equipment. For a typical half-inch copper or quarter-inch nylon job, the list fits in a toolbox drawer.
A torque wrench is not on this list for ordinary plumbing. Compression fittings are normally tightened by hand plus a counted number of wrench turns, which is simpler and repeatable once you understand the reference point. Torque figures are available for large or critical sizes, and they should be used when a manufacturer provides them, but the turn method is the working method in the field.
The sequence never changes: cut, deburr, clean, assemble, tighten, test. Each step protects the one after it.
When an experienced plumber opens a leaking compression joint and finds the ferrule sitting on a ridge of copper cut by a dull cutter wheel, the diagnosis takes one second. A square, burr-free cut is the cheapest insurance in the trade. Take the extra ten seconds to ream the inside and lightly sand the outside.
On most single-ferrule compression fittings, the nut slides on first with the thread facing the fitting body, and the ferrule follows with its tapered end pointing toward the body. Reversing the ferrule is a classic mistake. The taper has to mate with the body seat so the ferrule can deflect inward against the tube. If you install it backwards, the nut will still thread on, and the joint may even hold for a while, but the ferrule will not wrap the tube properly and it may leak after thermal cycling.
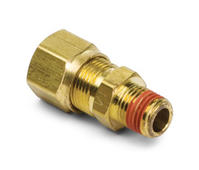
One wrench turns the nut, and the other holds the body. That second wrench is not optional. Without it, the turning torque passes into the tube, possibly twisting a soft copper line or loosening the joint at the other end of the fitting. When the compression end also has to thread into a valve, a brass compression male connector keeps the compression joint and the pipe thread in one body, so the installer pulls up only one joint instead of managing a separate adapter.
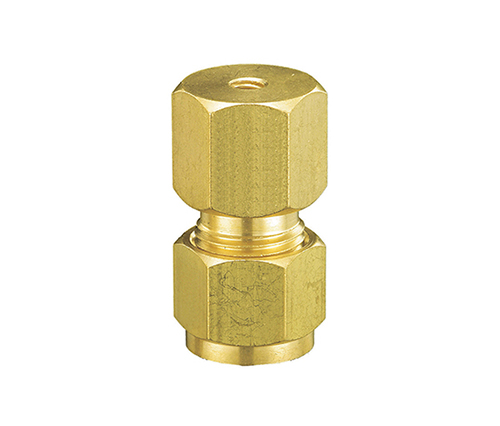 OEM 1/4 NPT Compression Double Male Connector Manufacturers, Factory - Zhejiang Zhejiang Qinwei Fluid Technology Co., Ltd is China 1/4 NPT Compression Double Male Connector Suppliers and Manufacturers, As OEM 1/4 NPT ...View Product →
The first rule is that a compression fitting is tightened past the point of finger tightness by a measured amount. The commonly repeated guidance is one to one and a quarter turns for a half-inch brass ferrule on copper tube, and three quarters to one full turn for smaller sizes. The important detail is where the count starts: from the point where the nut just snugs against the ferrule and body, not from where the nut first touches the thread.
Different materials change the number. A nylon ferrule on nylon tubing should be tightened less, usually a half to three quarters of a turn, because both the ferrule and the tube are soft. Annealed copper tube, which is soft and easily collapsed, also calls for a slightly shorter pull-up. PEX with a support insert follows the fitting maker's instruction, but the presence of the insert keeps the tube round and lets the ferrule grip without crushing.
What does a correct joint feel like? As the ferrule seats, resistance rises sharply. The nut moves smoothly for the first part of the pull-up and then becomes noticeably harder. That rising resistance is the ferrule biting into the tube. If the nut becomes hard before you reach the expected number of turns, stop and inspect. Something is wrong, usually a reversed ferrule, a rough tube surface, or a nut that is binding on the body threads.
Temperature changes matter. A hot water line installed cold will relax slightly when the brass expands on the first heating cycle. Many fitters mark the nut and add a quarter turn after the first warm-up cycle. Do not back the nut off to line up a hex face or rotate the body. If the body must face a certain direction, orient the fitting while the nut is still hand-tight, because backing off after pull-up breaks the seal you just created.
For critical sizes where a precise torque value is published, use it. The same catalogue that lists dimensions usually includes working pressure and tightening data. The manufacturer's compression fitting catalogue can be downloaded as a PDF for exactly this purpose, so the install team and the inspector are working from the same reference.
Copper is the classic compression tube. Rigid drawn copper tube holds its shape under the ferrule and produces clean joints with the standard one to one and a quarter turn procedure. Annealed copper, the soft roll tube used for appliance connectors, requires a lighter hand because the tube wall can collapse inward under an over-tightened ferrule.
Nylon and other plastic tubes are best served with nylon ferrules. A brass ferrule on nylon can cut the tube like a knife because the bite is too aggressive. Cut nylon with a square cut and remove the edge burr so the ferrule slides freely.
PEX needs a stiffener. A compression nut on unsupported PEX will simply crush the tube before the ferrule seats. Slip a suitable insert inside the PEX end, and the compression joint works like it does on copper. Some plumbing codes prefer other joining methods for PEX, so check the local requirement before using compression on PEX in a concealed location.
Aluminum is soft and forgiving but forms an oxide film that should be removed with abrasive before assembly. Steel tube is harder and demands more care in cutting; it is common in instrument and hydraulic work, where the fitting body is often stainless steel instead of brass.
| Tubing material | Typical use | Preparation before assembly | Tightening guide |
|---|---|---|---|
| Copper, rigid | Water supply, refrigeration | Square cut, deburr, clean with abrasive | 1 to 1-1/4 turns past hand-tight |
| Copper, annealed | Appliance connectors | Deburr, verify the end is round | 3/4 to 1 turn, watch for collapse |
| Nylon (PA11/PA12) | Pneumatic control lines, air-brake | Square cut with sharp blade, light deburr | 1/2 to 3/4 turn with nylon ferrule |
| PEX piping | Potable water | Install a support insert in the tube end | Follow the fitting maker's specification |
| Aluminum | Fuel and instrument lines | Deburr inside and out, remove oxide film | 3/4 to 1 turn, do not overtighten |
In wet service, direct contact between brass and aluminum can produce galvanic corrosion, so an isolating sleeve or a wrap is used on assemblies where brass fittings meet aluminum tube in a continuously wet environment. For dry pneumatic lines this is a non-issue.
Most compression leaks are not caused by the fitting. They are caused by one of the following errors.
The pattern should be clear: the joint that fails is usually the one that was rushed. The extra minute spent reaming and cleaning is repaid at the pressure test.
Compression is chosen when a reliable joint is needed with hand tools, no open flame, and the possibility of later disassembly. Soldered joints are cheaper for high volumes of new copper pipe and are permanent. Push-fit connections are faster but cost more per joint and rely on plastic O-rings that limit the temperature range.
For existing copper in an occupied building, compression is the usual repair method because a torch in a finished space is slow and hazardous. For pneumatic lines on machines, compression is often the only realistic choice, since soldering does not apply to nylon tube and push-fit connectors are rarely rated for the working pressures of industrial air.
| Attribute | Compression | Soldered | Push-fit |
|---|---|---|---|
| Tools required | Cutter, deburrer, two wrenches | Torch, flux, solder, brush | Cutter, deburrer, release tool |
| Open flame | No | Yes | No |
| Typical install time | 5 to 10 minutes | 10 to 15 minutes including cooling | 2 to 5 minutes |
| Disassemblable? | Yes | No, pipe must be cut out | Yes |
| Heat resistance | Good | Best | Limited by O-rings |
| Skill level | Low to moderate | Moderate to high | Low |
| Cost per joint | Moderate | Low | High |
In tight cabinets under a sink, compression fittings are practical because they can be assembled with a quarter turn of the wrench at a time in a space no larger than the fitting itself. Soldering a joint in the same space risks heat damage to the cabinet. Push-fit is the fastest, but the release tool needs a straight pull and some clearance in the opposite direction, which is not always available.
Removing a compression fitting is the reverse of installing: shut off the supply, drain the line, hold the body with one wrench and turn the nut counterclockwise with the second. If the nut is seized, a penetrating oil around the nut threads and a few minutes of waiting usually free it. Brass nuts can also be warmed gently with a heat gun when the line is steel or copper and empty of fluid.
After the body comes off, the ferrule stays on the tube. That is normal. The question is whether the ferrule can be reused. A brass ferrule that was pulled up once and removed can sometimes seat again, but the contact surfaces are already shaped and scratched, so the risk of a leak at the original orientation is real. The standard professional practice is to cut the tube behind the ferrule and install a new fitting, or to slide the nut off, remove the old ferrule with a ferrule puller, and fit a new one.
If you are servicing a fitting where the nut must come off but the ferrule and body are staying, mark the nut face with a marker before loosening. When you retighten, return the nut to the same position and add a quarter turn. That preserves the original orientation and runs the ferrule slightly deeper, which closes any relaxation that occurred during service.
Nylon ferrules are single-use in practice. They deform too much to reinstall reliably, and the material takes a compression set under load. Always replace a nylon ferrule when the joint is opened.
Minor seeping is the most common symptom, and the usual cause is simply not enough pull-up. Dry the joint with a rag, hold the body, and add a quarter turn. Wait and watch. Many weeping joints stop after that single quarter turn.
A leak that appears only after the line has been heated and cooled is almost always a relaxation issue. Allow the line to cool, then add a quarter turn. Do this once and mark the nut, and resist the urge to keep turning.
A leak at the pipe-thread end of the fitting, where the body enters a valve, is not a compression problem at all. The NPT thread needs sealant. If it still leaks, the thread type may be mismatched, the fitting may be bottomed out without engaging the taper fully, or the brass may have cracked from over-tightening at the port.
A leak that survives two quarter-turns on the compression nut needs attention. Disassemble the joint and inspect the ferrule and the tube. A cracked ferrule, an out-of-round tube, or a scratched tube surface means the joint must be remade, not re-tightened. Cut the tube back to clean material, install a new ferrule, and repeat the full procedure.
In a plant environment, the same training that produces a clean compression joint also produces predictable maintenance. Crews that standardize on one fitting family carry one size of spare ferrule and one tightening procedure. This is one reason compression fittings are the backstop technology in pneumatic control cabinets, water treatment skids, and rail or truck air systems.
Vibration changes the rules. A fitting mounted directly to a pump or an engine experiences cyclic loads, so the tube should be supported with clamps within a short distance of the fitting, and the joint should not carry the weight of a long unsupported run. In high-vibration applications, some maintenance teams add a quarter turn at the end of the standard pull-up, but the better solution is mechanical support rather than more torque.
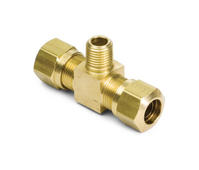
Branching and manifolds are a common source of improvised joints. When an existing line has to feed a second consumer, the professional approach is a tee that uses the same compression technique on all three ports. Compression tee fittings are made for this type of work, since they let a service technician branch off an existing copper or nylon line without soldering and without disturbing adjacent joints.
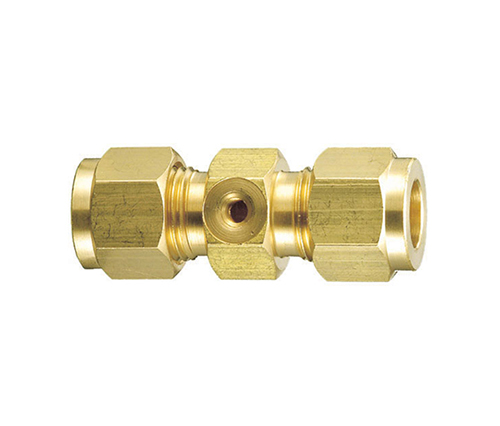 OEM 1000 PSI Fog Compression Tee Fittings Manufacturers, Factory - Zhejiang QinwZhejiang Qinwei Fluid Technology Co., Ltd is China 1000 PSI Fog Compression Tee Fittings Suppliers and Manufacturers, As OEM 1000 PSI Fog...View Product →
In commercial vehicles, compression connectors on DOT air-brake lines are regulated parts, and the body should carry the D.O.T. marking. Installation should follow the vehicle manufacturer's guidance, including the torque and the requirement to cut the nylon line with the correct cutter so the end is square and free of cracks.
Not every compression fitting lives behind a sink. Greenhouse fog lines, livestock cooling systems, and industrial dust suppression networks use compression connections because they are compact, corrosion-resistant, and easy to rework when a nozzle position changes.
A misting line runs at moderate water pressure in a wet environment. The tube is often nylon or polyethylene, which means the ferrule should be the plastic type specified by the fitting maker, and the tube end needs a rigid support at the fitting. Because nozzles are spread along the line at frequent intervals, installers prefer fittings that add the least length and that can be turned into position before the nut is pulled up.
For atomization systems where the nozzle itself mounts on the compression end, a compression single nozzle connector reduces the number of threaded interfaces between the tube and the spray tip. One compression joint replaces a threaded adapter, a nipple, and a nozzle holder, and it keeps the nozzle aligned square to the line.
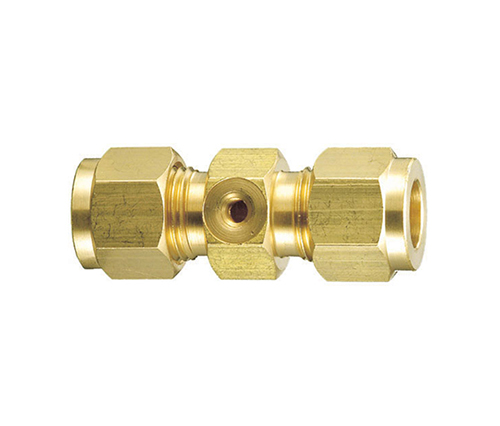 OEM Brass Straight Compression Double Nozzle Manufacturers, Factory - Zhejiang QZhejiang Qinwei Fluid Technology Co., Ltd is China Brass Straight Compression Double Nozzle Suppliers and Manufacturers, As OEM Brass Str...View Product →
The finished installation inherits the quality of the fitting. Two fittings with the same thread size can behave very differently under the same wrench because of differences in ferrule hardness, body thread finish, plating, and the lead content of the brass. For a single repair, the risk is small. For a company that installs thousands of fittings a year, the risk multiplies.
A buyer should ask for the standard the fitting is made to. Suppliers that export to North American markets usually certify against ASTM or SAE dimensional standards for their brass fittings and against DOT requirements for air-brake parts. The certificate should refer to a batch, not just to a product family. Batch traceability matters because a production run with a bad heat treatment or an alloy deviation affects every ferrule in that box.
For potable water applications, check the lead compliance of the brass body. For pneumatic and truck applications, verify the pressure rating and the D.O.T. marking. A factory supplier with its own machining line can provide consistent plating and thread quality, which reduces rework for distributors who sell to professional plumbers and repair shops.
Commercial terms also deserve attention. Factory-direct suppliers typically quote a price list with tiered discounts for quantity, and the logistics cost per fitting is lower when the order can be consolidated. A modest price difference per fitting disappears quickly if one failed joint causes a machine stoppage or a service call. That is why the install guide and the purchasing checklist should be read together.
Compression fittings earn their place because they are simple: cut the tube square, deburr it, clean it, slide on the nut and ferrule, bottom the tube in the body, and pull the nut up by a counted number of turns. The joint will hold water, air, and a good deal of vibration when the workmanship is right. Keep the surfaces clean, respect the ferrule orientation, use two wrenches, and let the pressure test be the final judge. When you follow those steps, a brass compression fitting installed today will still be a dry fitting when the next maintenance cycle comes around.
Add:Xingzhong Road DianKou Town Zhuji City Zhejiang Province China
Mob: 0086-139 8951 3573
Tel: 0086-575-87560582
Fax: 0086-575-87560582
E-mail:[email protected]

 英语
英语 西班牙语
西班牙语