24Hours Tel
0086-139 8951 3573
Free Inqiry
E-mail:[email protected]
24Hours Tel
0086-139 8951 3573
Free Inqiry
E-mail:[email protected]
How to install a hose connector
Install push-in accessories
How to install the push-in accessories without any drumming or panic. As in most cases, preparing and using the right tools is just as important as the actual work.
In this article, we will consider the following:
Which hose and accessories to use
Tools required to install hose connectors
Which hose and hose connector to use
This may seem obvious, but it is certain. Before discussing in detail how to install a hose connector, we need to make sure that the product used is correct. The size of the hose or hose is important. The AN system uses imperial internal size hoses instead of metric hoses. Make sure your hose is correct. If in doubt, please contact your supplier to make sure.
This is a hose size chart, which includes inner diameter information.
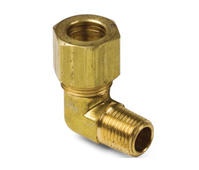
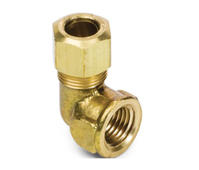
How to install the push-in fitting on the hose
The type of "push-in" hose you use may be an AN accessory, but it may be a Banjo or other design. Before assembling the hose, make sure that the hose is suitable for the application (meets the requirements).
Required tools-how to install hose connectors
If you are the one who changes or even creates cars (or bicycles), then you will have all the necessary tools. Basically, you need to do the following to install the accessories on the hose:


Bench vise
Dental saw-cut hose
Pitcher or water storage tank, can receive hot water
Vice-hose bracket, unmarked. If you spend more than $ 60,00 net on hose fittings, you can get them for free at Speedflow
If you do n’t have a jaw, do n’t worry. It is important not to damage the pressure on the hose connector when pressing the vise. You can use cards or tape attached to metal vise or hose fittings to do the same job.
How to install a hose connector
Only four simple steps are required to ensure that the hose connector is properly installed.
Step 1
The first step is to cut the length of the hose. You can fix the hose in a plastic vise to keep it stable. Use a fine-tooth saw to cut the square of the hose and keep the surface clean. Remove any debris or loose ends.
Hose accessories, step 1, cutting hose
Step 2
Place the hose connector in the vise. Use the plastic jaws of the vise or any other means to prevent damage to the hose joint that secures it in the vise.
Press the hose connector in the vise
Step 3
To be sure, you already know that the hose will not easily slip onto the hose connector. What we will do will facilitate this process.
Take a large cup or pot of hot water below the boiling point. Place only a few inches (50 to 70 mm) of the end of the hose in hot water and leave it in for a few minutes. Make sure that the water tank does not fall or sprinkle water or cause injury. This will soften the hose without damaging it. Carefully check that the hose connector is firmly fixed, and then slide the hot end of the hose onto the connector. As he approached the collar, it became more difficult for him, but as long as he remained twisted, he pressed until he reached the bottom of the collar.
When installing the hose connector, do not use any grease. This may leave residues and affect hose safety.
Hose connector with installed hose
Step 4
Check that the hose is as close as possible to the pressure connector of the hose and press it firmly on the collar.
Add:Xingzhong Road DianKou Town Zhuji City Zhejiang Province China
Mob: 0086-139 8951 3573
Tel: 0086-575-87560582
Fax: 0086-575-87560582
E-mail:[email protected]

 英语
英语 西班牙语
西班牙语